Globus Quick Start Guide
This is intended to be a quick-start guide, for more detailed information, please see our other Globus articles here: Globus documentation
Globus is a third-party service for transferring large amounts of data between two Globus Data Transfer Nodes (DTNs). To use Globus to transfer data to or from NeSI, you need:
- An active NeSI account (see Creating a NeSI Account)
- A Globus account (see Initial Globus Sign-Up and Globus ID)
- Access to Globus DTNs or endpoints
- Access to a DTN (e.g., at your home institution)
- Personal endpoint if no DTN is available
Globus Account
Please note that a Globus account is not the same as a NeSI account. You will need both Globus and NeSI accounts in order to transfer data to or from NeSI HPC and storage facilities.
To get a Globus account, go to https://transfer.nesi.org.nz/ and sign up using one of the available options on the page. Please note that the "existing organizational login" is somewhat limited, if your organisation is not listed, please sign in (sign up) using any of the other methods.
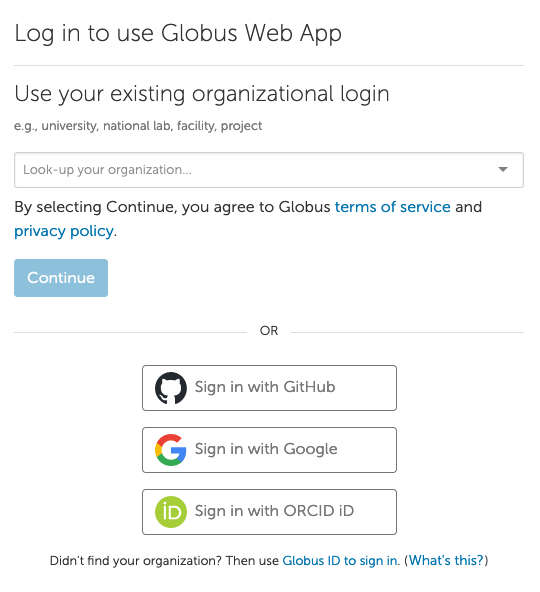
For more detailed instructions please see Initial Globus Sign-Up, and your Globus Identities.
Globus Endpoint Activation
A NeSI account is required in addition to a Globus account to transfer data to or from NeSI HPC and storage facilities.
To transfer data between two sites (for example, NeSI platforms and the University of Otago central file storage), you need to have access to the DTN or
endpoint at each location. You will also need the appropriate read and write permissions from where you're
copying to and from. Please note that the NeSI project directory is read only, and nobackup is read and write.
A list of some Institutional endpoints can be found here: National-Data-Transfer-Platform. You can also set up your own personal endpoint to transfer data to or from your personal computer, however, administrative access to your computer is required.
To activate the NeSI endpoint click go to https://transfer.nesi.org.nz/ and click "file manager" on the menu bar on the left.
- Next to "Collection", search for "NeSI HPC Storage", select it, then click "Continue".
- Select your identity provider from the list to authenticate and continue.
Transferring Data
To transfer data, activate your two endpoints and navigate to the appropriate folders, then select the files or folders of interest. To initiate the transfer, select one of the two directional arrows. In the image below, the 'config' folder is being transferred from the location on the right, to the location on the left.
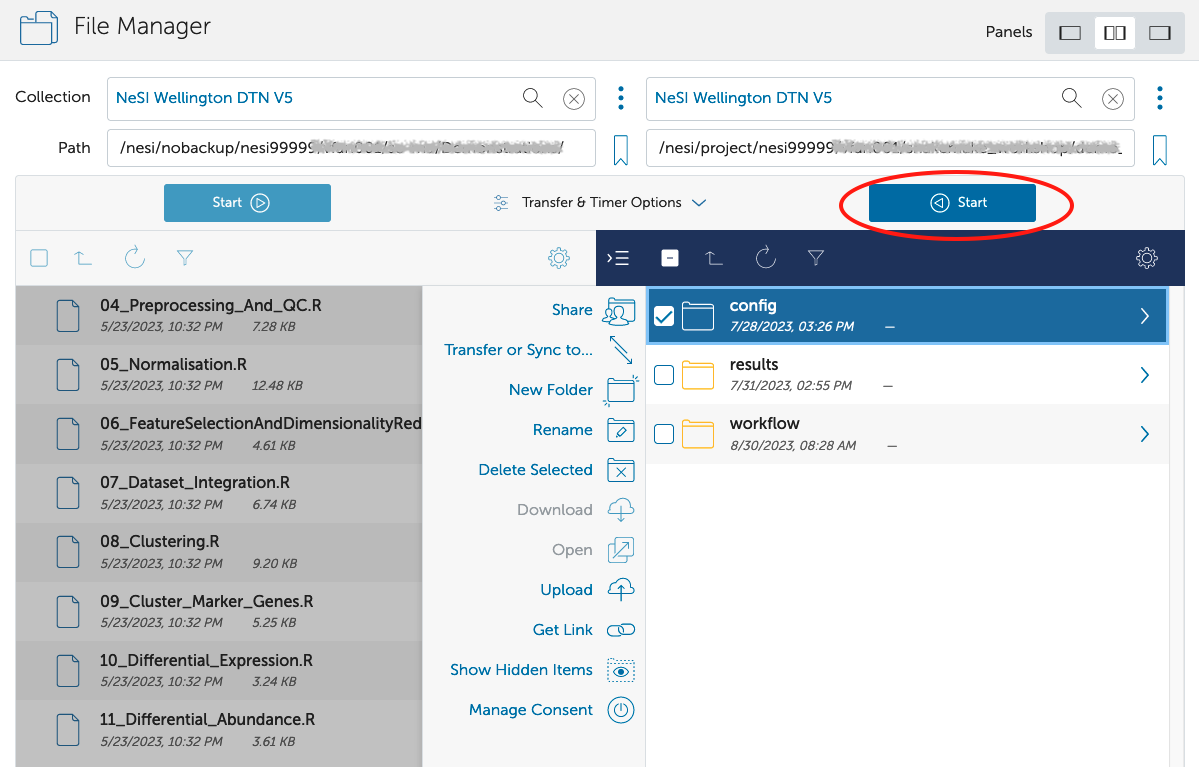
To see the progress of the transfer, please click 'Activity' on the left hand menu bar.
If you have any questions or issues using Globus to transfer data to or from NeSI, Contact our Support Team